-
Set up Zend framework 2 with NetBeans Running on XAMPP
Posted on April 2nd, 2014 12 commentsZend framework is an open source MVC framework implemented in PHP 5. Like other popular MVC frameworks (ASP.NET MVC, Java Spring MVC), Zend provides database abstraction, code skeleton, and more. Let’s see how to use it on NetBeans:
- Download necessary packages from Zend: Application Skeleton from here, and full framework from here. Also the composer package here (if you don’t have it on your system)
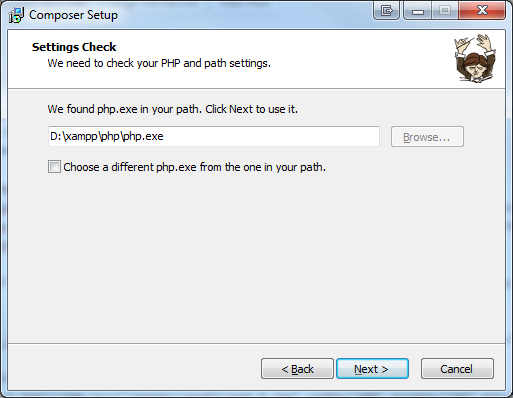
- Install php composer (if you haven’t installed), remember to select correct php.exe file under XAMPP
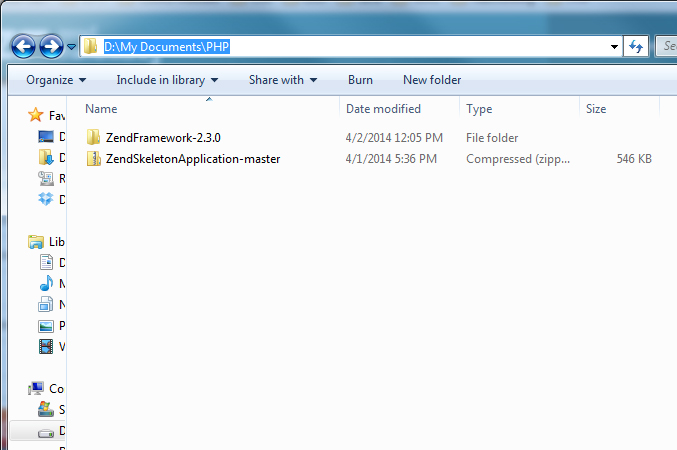
- Put skeleton and framework files into desired folder, unzip the framework file, but keep the skeleton zipped
3,543 views -
Best way to create you own php.ini on Windows host
Posted on June 25th, 2012 Add commentsI have a Windows host package on Godaddy.com, and recently moved my wordpress blog to this hosting server. Sometimes I need to change some php settings for the wordpress, so I decide to create my own php.ini instead of using Godaddy one.
First of all, we don’t need to create a brand new php.ini from scratch. We can just use Godaddy’s default php.ini as reference. So, just create a php file called “phpinfo.php”, put the following code below and upload the file to your hosting server (this step is to find where the Godaddy’s php.ini file located. If you know the location, just skip this step):123<?phpecho phpinfo();?>Browse this file from your hosting, and will see the phpinfo page including all the settings. Look at the line of “Loaded Configuration File” section, find the location of Godaddy’s php.ini. In my case, it’s “c:\cgi\php5\php.ini”.
Next, create another file called “phpfile.php”, and put the following code below, then upload to the server.123<?phpsystem("type c:\\cgi\\php5\\php.ini");?>Browser this file and get a page with lot of plain text. Use your browser to view the source of this page, save the source as “php5.ini” (Note: NOT “php.ini”), and you got Godaddy’s php.ini already.
In my case, I just need to change some settings like below:12max_execution_time = 300 //from 30 secmemory_limit = 128M //from 32MAfter modified your php5.ini, upload it to the root directory of hosting server. In Godaddy hosting, you need to do the following:
- Log in to your Account Manager.
- Click Web Hosting.
- Next to the hosting account you want to use, click Launch.
- In the Content section of the Hosting Control Center, click the IIS Management icon.
- Click Recycle App Pool and follow any prompts.
- Reload the phpinfo.php page to see if the desired changes have taken effect.
174 views -
How to fix comments submitting problem on WordPress
Posted on May 1st, 2010 Add commentsWhen submit a comment on WordPress, if you see an error massage like “Error 404 Not Found” something, most likely need to modify the “.htaccess” file of PHP.
The “.htaccess” file is located on the root directory of your hosting. find the line like showing below:1RewriteRule (.*) ^http://%{REMOTE_ADDR}/$ [R=301,L]This is a function to protect your blog from spam. You can simply just comment the line, then you are all set:
1#RewriteRule (.*) ^http://%{REMOTE_ADDR}/$ [R=301,L]
411 views -
PHP None-Thread Safe & Thread Safe区别(非线程安全与线程安全)
Posted on April 22nd, 2010 1 comment由于PHP是在Linux/Unix系统下开发的,而又由于Linux/Unix系统是采用多进程(process)的工作方式而Windows系统是采用多线程(thread)的工作方式。如果在IIS下以CGI方式运行PHP会非常慢,这是由于CGI模式是建立在多进程的基础之上的,而非多线程。一般我们会把PHP配置成以ISAPI的方式来运行,ISAPI是多线程的方式,这样就快多了。但存在一个问题,很多常用的PHP扩展是以Linux/Unix的多进程思想来开发的,这些扩展在ISAPI的方式运行时就会出错搞垮IIS。因此在IIS下CGI模式才是 PHP运行的最安全方式,但CGI模式对于每个HTTP请求都需要重新加载和卸载整个PHP环境,其消耗是巨大的。
为了兼顾IIS下PHP的效率和安全,微软给出了FastCGI的解决方案。FastCGI可以让PHP的进程重复利用而不是每一个新的请求就重开一个进程。同时FastCGI也可以允许几个进程同时执行。这样既解决了CGI进程模式消耗太大的问题,又利用上了CGI进程模式不存在线程安全问题的优势。
因此,如果是使用ISAPI的方式来运行PHP就必须用Thread Safe(线程安全)的版本;而用FastCGI模式运行PHP的话就没有必要用线程安全检查了,用None Thread Safe(NTS,非线程安全)的版本能够更好的提高效率。
5,524 views -
WordPress with internal server error on 1and1 hosting
Posted on March 3rd, 2010 Add commentsFor some reason, wordpress will always display “Error 500 – internal server error” for some PHP pages. My webhosting is on 1and1, so somehow the setting of PHP server is not correct.
Finally, got a solution and it works:Modify the file .htaccess on the root directory:
- Add the code following at top of .htaccess:
AddType x-mapp-php5 .php - Changing:
RewriteEngine on
to:
RewriteEngine ON
Save the file, upload to the server. Here you go.
518 views - Add the code following at top of .htaccess:


Recent Comments