肖恩D++
Not Equal C && !=C && 不等于西
-
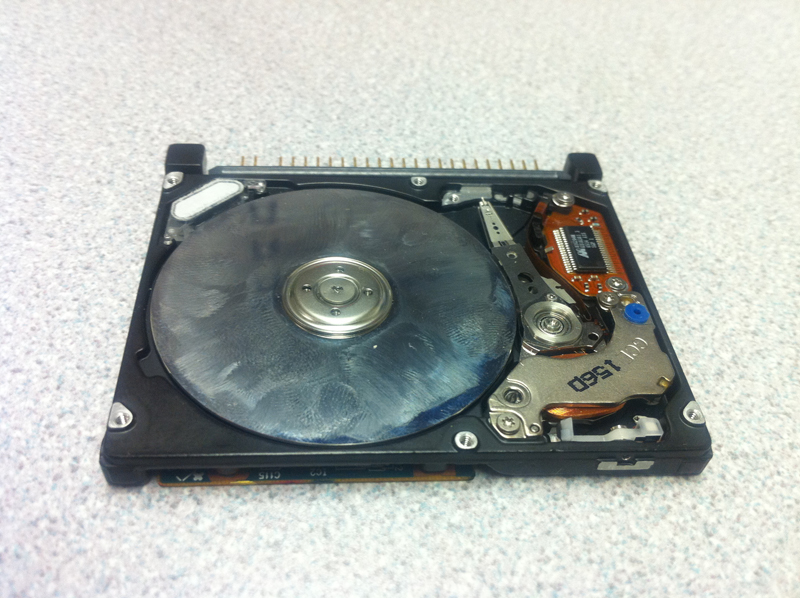
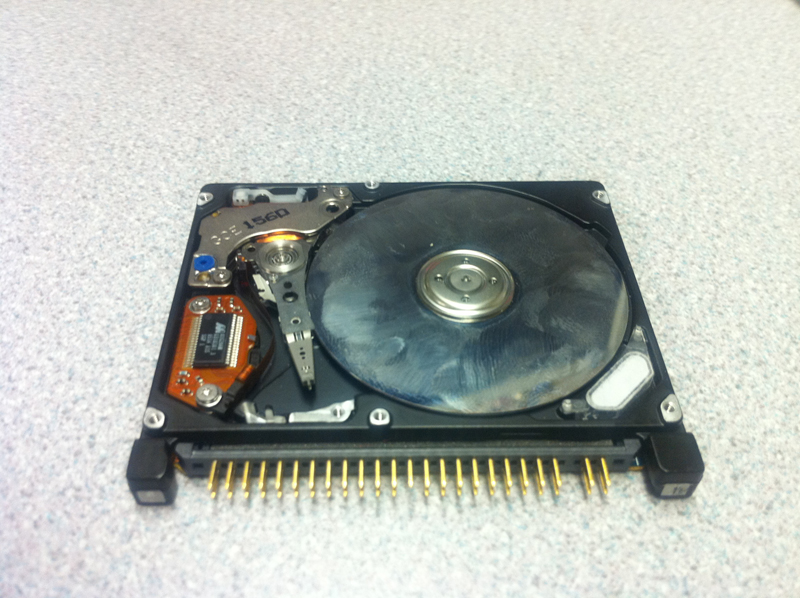
裸盘
Posted on November 24th, 2010 Add comments
551 views -
中文Mac系统下MonoDevelop乱码解决
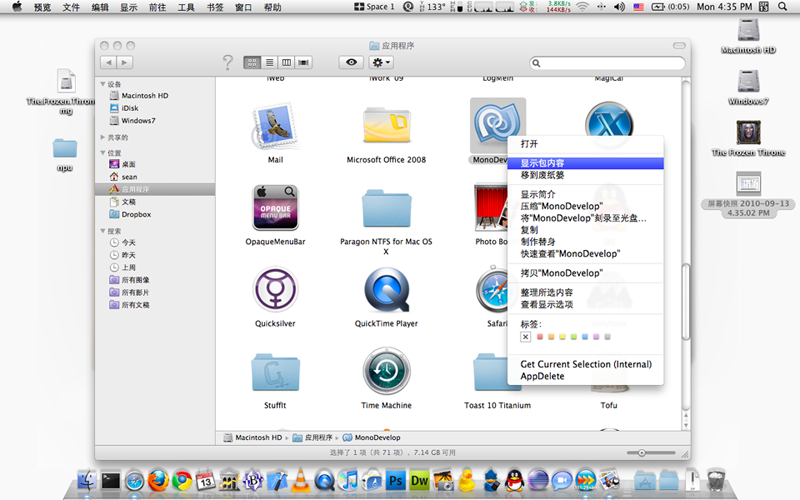
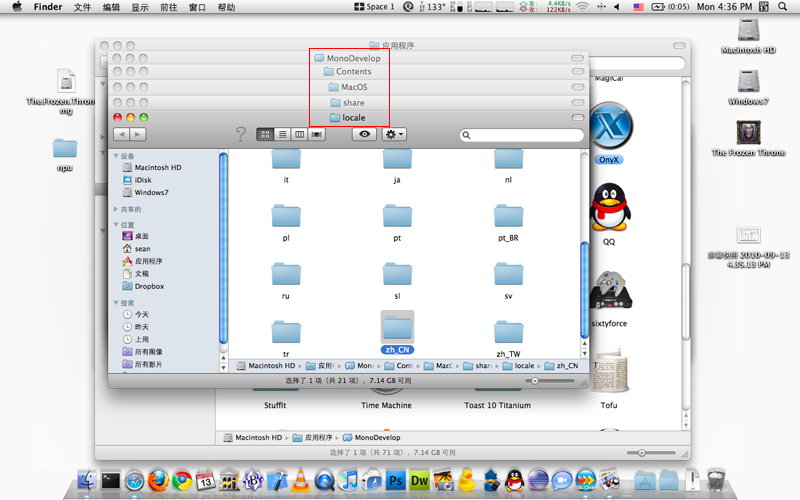
Posted on September 13th, 2010 2 comments在英文界面的Mac系统下,MonoDevelop运行十分完美。可当切换Mac的系统语言至中文时,Mono的界面语言会变成乱码,估计是Mono中文翻译包的简体编码问题。这点实在没时间讨论,所以最快的解决办法,就是将Mono在中文系统下的默认语言也变成英文:
(点击图片可看大图)
5,235 views -
How to print screen with mac which is running Windows
Posted on July 2nd, 2010 3 commentsFor Microsoft ASP.NET, I have to have Windows on my Mac for installing visual studio, then I need to use Windows for a while. But there is no such “Print Screen” key on Mac keyboard, so if I want to print a screen or a window, need to use combined key:
- First, Windows needs Bootcamp installed
- If want to print whole screen, use SHIFT + FN + F11
- If just want to print current window, use ALT(option key) + SHIFT + FN + F11
- Paste the screen to picture editing tools, such as Photoshop
561 views -
How to make DMG file on Mac
Posted on June 23rd, 2010 2 comments- Create a new folder and copy the files you want in the DMG image into this new folder.
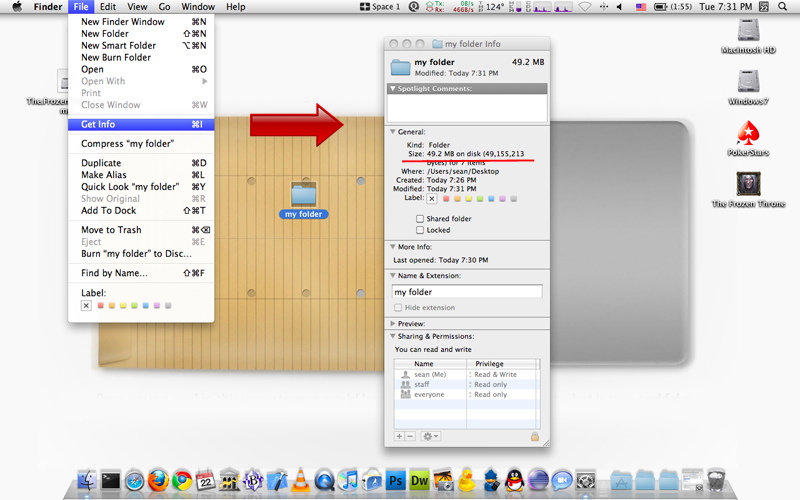
- Choose this new folder, and on the top menu bar click: File -> Get Info, find the size of this folder (e.g. 49.2 MB)
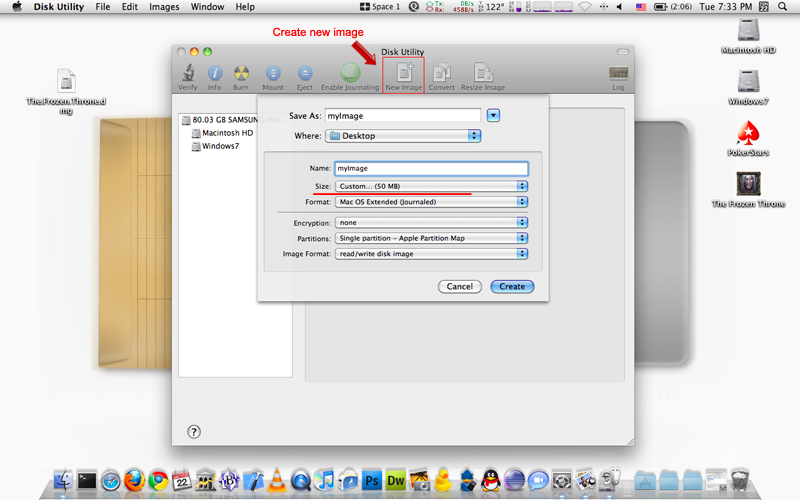
- Open “Disk Utility”, go to Applications -> Utilities -> Disk Utility
- Click the “New Image” icon to create a new disk image, enter a name for the image, and select a size adequate for the size of your folder you created in step 2 (usually should be little bigger, e.g. 50 MB here). Set the encryption to “none” (if you don’t want set password for it) and format to “read/write disk image”
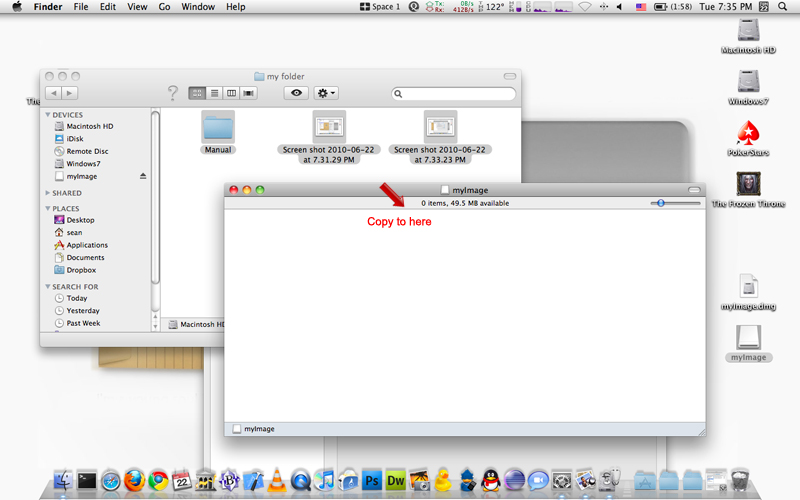
- Place the contents of the folder created from step 2 into the newly mounted disk image
- Unmount the disk image after copy done, the DMG file is what to you want
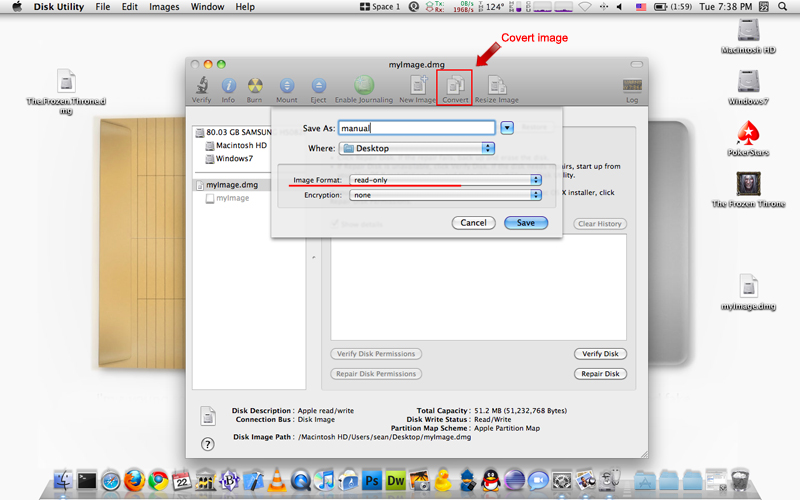
- Option: Go to “Disk Utility” again, choose the image file and click “Convert”, then set “Image Format” to “read-only”.
(This step just make your disk image can’t be modified in the future)
1,292 views





Recent Comments